Residential Solar Photovoltaic
Translate This Page
Solar PV Trackers
At the beginning of 2012 solar photovoltaic (PV) prices finally arrived at a price at which their output versus cost equalled that of one of our wind turbines. Decent PV panels are available from importers at around £0.65 per watt (Sept 2012). Most panels are now monocrystalline, reasonably efficient and are usually built into a robust aluminium frame. Sizes vary but in general most are 1metre in width and vary in length depending on panel output e.g. a 250 Watt panel is 1m by 1.6 m.
Obviously the Sun is not static, and throughout the year also changes its position by 23.5 degrees: lower in winter, and high in summer. So if you use Trackers, you can then can adjust for the seasons of the year and follow the sun from sunrise to sunset. So far we have found that our trackers are 31% more efficient in energy production than fixed panels stuck on a roof.
Working and making Hugh Piggott’s design of Wind Turbine made us realise how simple machines using minimal materials and a simple design could also be applied to Solar Trackers. There are several manufacturers of solar trackers on the market, but they are expensive, and some overly-complicated, with GPS systems, heavy duty bearings and complicated moving parts. Enter our New Solar Tracker Design"
Our Solar Trackers were designed and built here at “Le Vivray”, with thanks here to the Navitron Forum members who gave their input! They are simple to make, and require few tools: just a welder, drill press, angle grinder/cutter, G clamps and sash clamps. Total weight above ground for each tracker, fully loaded up, is about 245Kg. - For comparison, our upright piano is 220kg!
Our original design is for 1.5kW per tracker, but with slight modification they could be stretched to 2kW, or 8 x 1.6m by 1m panels (ours are 1.4m by 1m), with only a slight addition on the 4 cross rails, and re-adjustment spacing on the down-rails onto which the PV panels are bolted. Watch this space.
We will produce a booklet on “HOW TO MAKE A SOLAR PV TRACKER” once this new design has survived the Normandy winter with the modifications we have added. During Sept 2012 we will have altered the actuator bottom mount to a New design that incorporates the Declination movement and gives a fool-proof rigidity to both adjusters.
Costs At present the best price per solar tracker we can achieve is about £700 each for the materials, excluding controller and PV panels. Total costs for 3kW electricity generation for our 2 trackers INCLUDING control systems, PV panels and controller is about £3400.
The Electronics Sun Sensing units from “Dave in Australia” are working brilliantly, as the tracker does not spend all its time wasting precious energy hunting for the pinprick of Sun. And when it’s dark, the tracker parks in the East ready for the morning. - We have joked that we will measure the voltage we get from the incredible moonshine here in Normandy!
We ordered 2 units from Dave, 1 finished & boxed, and one kit (just PCB and bits)…. Total ~ £130. Contact Dave at dave@campatracka.com David Harvey, 90 Young Road , Cowra, NSW 2794 Australia . But you will need to modify/weld the top arm swivel joint, or it will just fall out! And with that, here are a few pics from our solar tracker project.
Actuators. We used the 24V versions and we are operating the 36v Actuators with 24 volts, max drain 1.6 amps. Jaeger Heavy duty 24-inch actuator. QARL-3624+”, £248 for 2. - Will lift 90Kg swinging on the tracker panel corner.
http://www.satellitesuperstore.co.uk/satellite_diseqc_motors_36_volt_motors.htm#24inchh
Solar tracker project
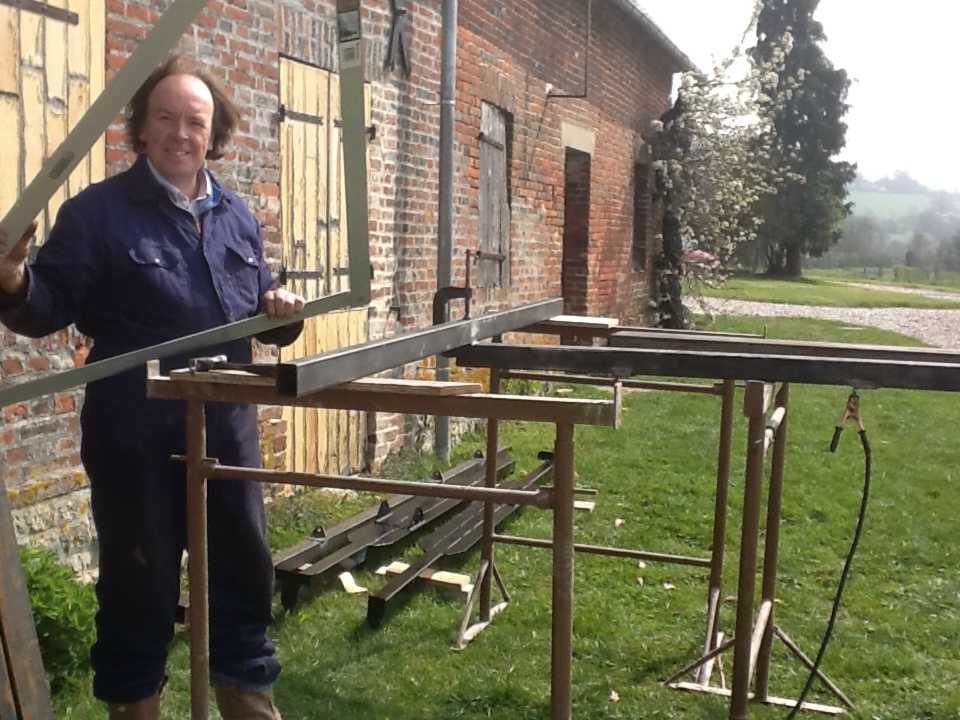
First of our 2 solar trackers starts to take shape. New design, minimal materials, minimal costs, and possible to DIY. Will be supporting 8 solar panels, for a total surface area of 2.6m x 4m and 1.5kW. Here's the main mounting pole unit, some metal paint and it's ready to be concreted into the ground in a 1m x 1m x 800mm deep dovetailed hole....
Both solar tracker poles are now concreted into place. You can see the holes at the top of the pole for mounting the hinged cross-member that supports the solar panels. The first cross-member is pictured below. The holes indicate the position of the hinges which will support and move the panel sheet in the East/West direction.
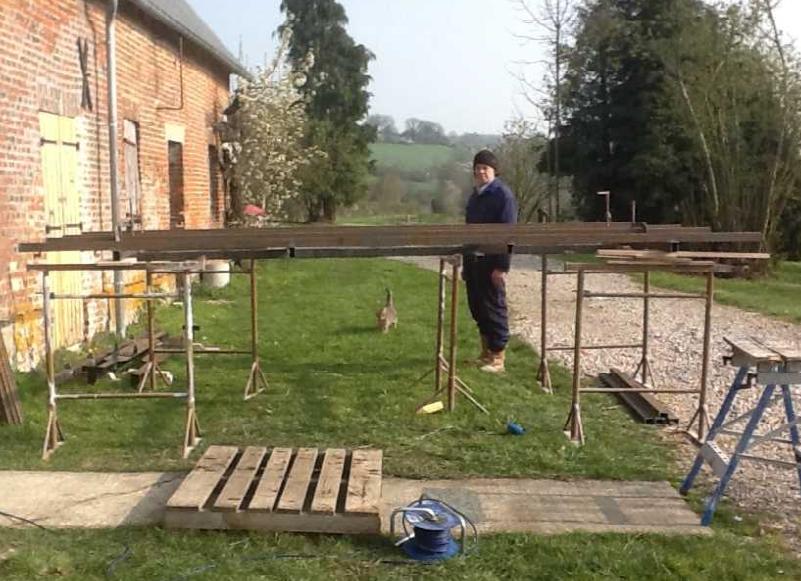
Solar tracker #1 in place below during the April showers, ready for panels and wiring up. Oh, and sheep..
Starting to follow the sun....
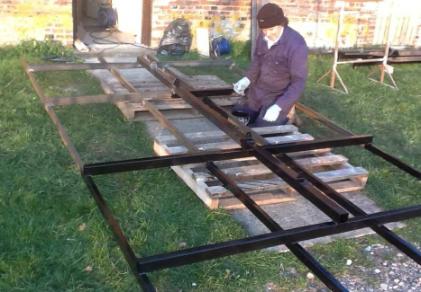
Squaring up to make the main solar panel frame that faces into the sun. Here you see the first metal straps being laid out, together with a picture of the first frame, fully welded.
You can get some idea of the scale by comparing with one of our very large cats, mid-picture, an active follower of this project... - Each frame is 2.6m by 4m, and can support 1.5kW-worth of panels.
Finished frame being painted below.
Both solar trackers now in place, with view down to the wind turbines. Meadow full of dandelions. Now trench digging to lay cables...
The panels will generate a theoretical maximum of 3kW solar energy, with the advantage over wind of (almost!) no moving parts. But considering This Is Normandy, we are very interested to pit our theoretical maximum of 3kW of wind turbines against it! Once this project is completed we will be well on the way to getting ourselves off-grid! And of course we intend to use "eco-electricity" for our future "ecogite" accommodation as far as possible.
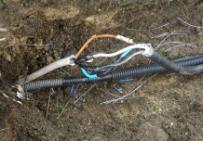
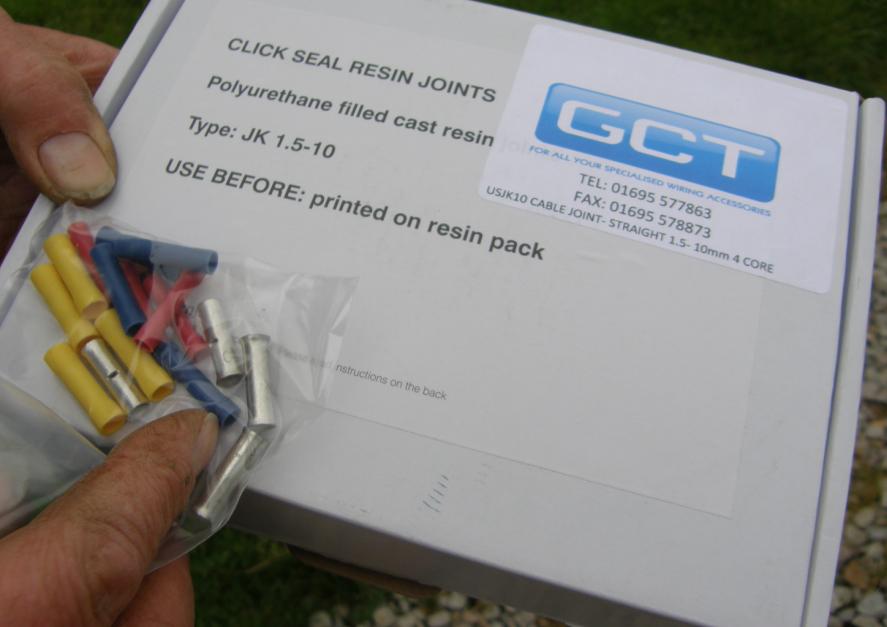
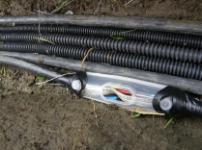
It's one thing putting in the tracker infrastructure - it all looks very pretty - but the battery power station is down at the lavoir (wash pond), home to the wind turbines, our current principle source of off-grid electrocity... but about 200m away! So 200+ metres of digging ensued, and a complex laying of armoured cable to carry electricity and data, including resined joints (no comment!). And all of this under the "soleil normand"!
Here you can see the different steps to laying the cables and doing the so-called "click seal" resin joints. Whilst a lot of work, click seal resin joints are much safer, reliable and long-lasting than simple or "domino" joints - especially as we solder the joints as well. There are a couple more joints than we'd have normally have because we bought recycled or leftover cable from E-bay, one of our preferred sources since at least if we can't source new non-eco stuff we can do our bit - and save money - by using someone else's unwanted stuff.
The trouble with classical domino joints generally is that when the wires expand on heating, they tighten the contact and push the retaining screw out a little. Then when they cool down again, the contact loosens. When this happens repeatedly, this can eventually cause a short circuit, and depending where the wires are located, can also constitute a significant fire risk.
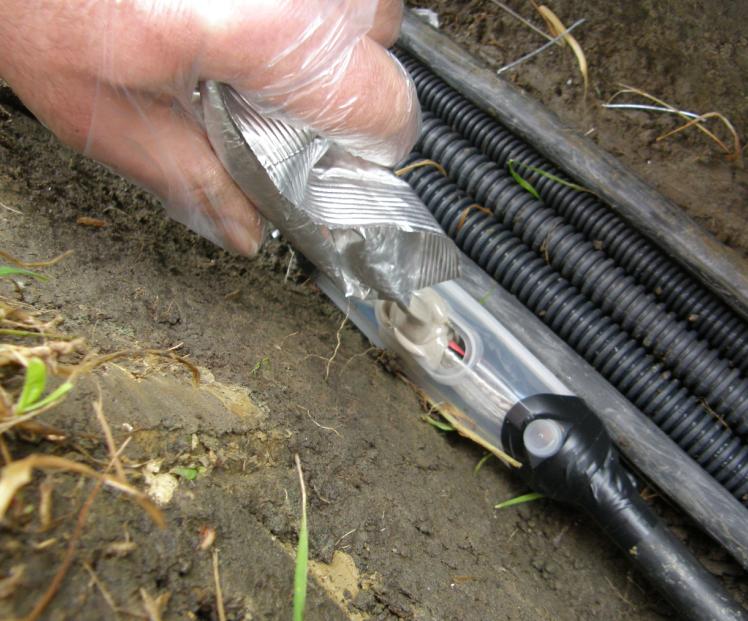

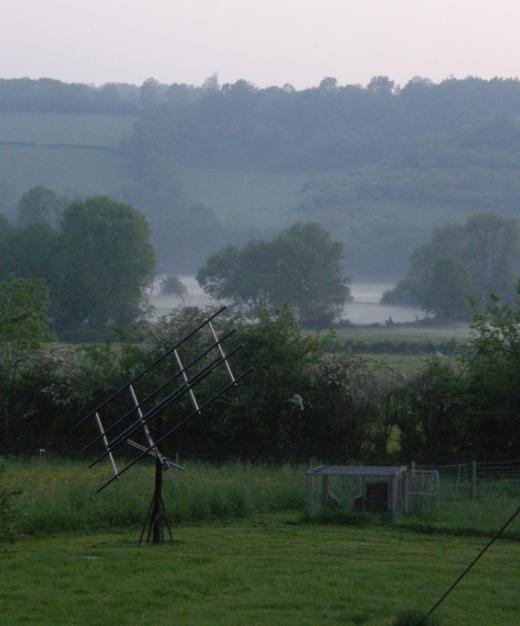
The shots below also capture some of the digging. And filling. By hand. You can also see the magical effects of the cool of the night arriving over the River Touques after a warm day. It's quite uncanny to see the mist rolling over the river, accompanied as the light dies by the dulcet tones of many hundreds of frogs and crickets and giving way to a moonlit night!
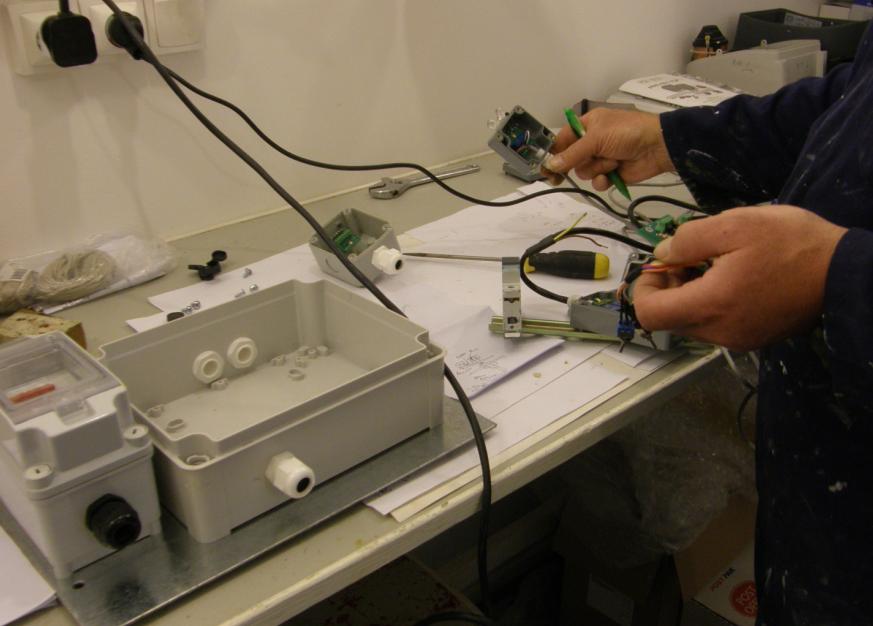
The cables are in, so we can turn again to the electronics...
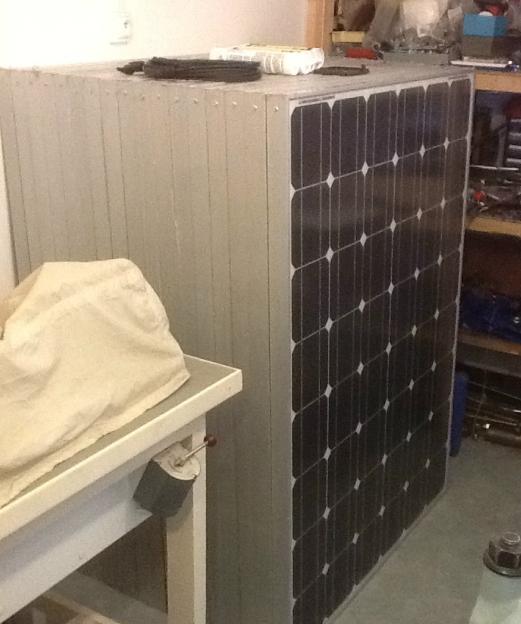
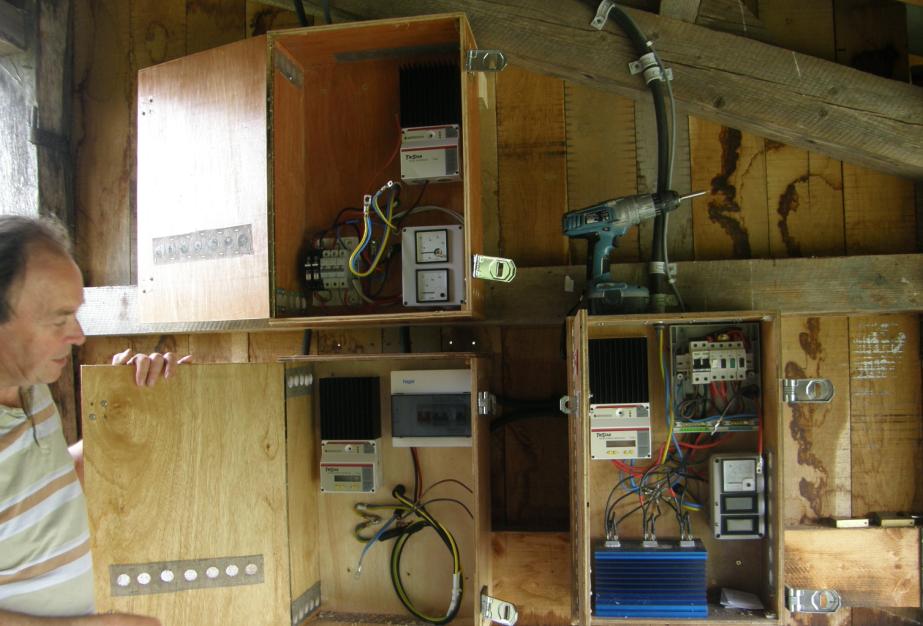
Below you can see the panels all stacked up, for pre-testing. Then the electronics, including the tracker circuits (more detail will be added into our book).
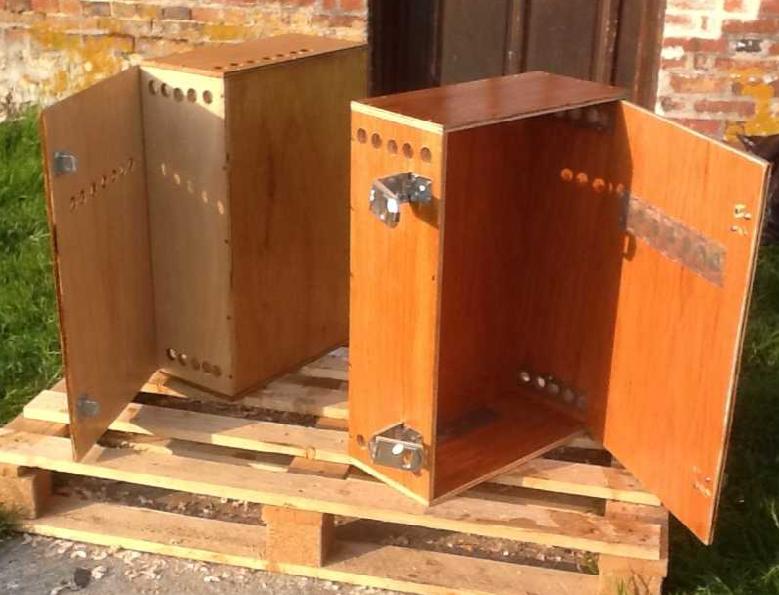
Afterwards construction of the marine ply control boxes, piano-hinged, lockable, and varnished. And everything - nearly - in place down in the lavoir (wash pond) building. The energy from the panels will be channeled such that it is possile to use the same storage station for both the turbines and the panels, including the control box for wind turbine number 3 currently under construction.
Next will come the most exciting part, mounting the PV panels onto the trackers!
Et voila!
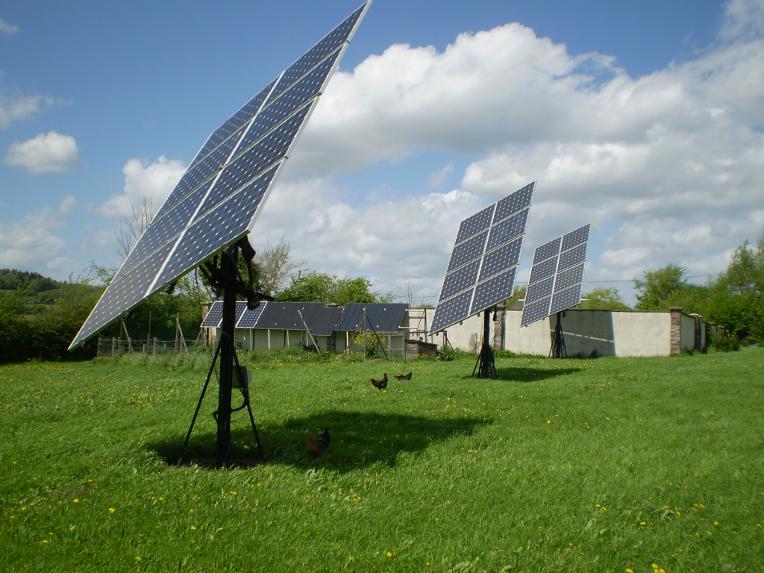
5kW of PV on Trackers and 3kW on Static Array.
© 2025 Echorenovate Sally Woods-Bryan & Leslie Bryan Microengineering